Sunday, December 14, 2025

Dashboard change

 so the car came with the Nismo 320kph dash which looks pretty good but I had been told at purchase time that it was not converted to read in mph ie both speed and odometer read in kilometres. Obviously within er 100yrds of driving the car I knew that was not the case for the speedo (Phone GPS on Google Maps) and then quickly realised the odometer was also reading in miles. Now this might not seem like a problem but have a look at the sweep the needle needs to take to hit 30mph or 60mph..  

R33 GTR Nismo 320kph Dials


so yeah thats not a large sweep eh? It's not quite 1degree of movement equals speeding ticket but it does require a certain amount of looking to confirm the speed or look at the phone to check the GPS speed. Bit of a faff tbh but to be honest the speedo is accurate even if the resolution is somewhat narrow. I've hummed and hawed about getting the OEM dash display fitted and then getting the odometer reset to match the current reading if for no other reason than continuity of the MOT readings. So back in July and armed with the GTR.co.uk dash removal guide and a freshly bought though 2nd hand 28yr old dash display I got stuck in. 

The guide says it's not critical to remove the upper steering wheel shroud to get the dash off but it certainly helps. First issue hit, I cannot get the screws out from the shroud and apparently there are six! of them. No wonder Nissan was broke in the 90's eh?

This is what I was fighting with

stupid different screw head holding steering wheel shroud in place


and then this one

stupid different screw head holding steering wheel shroud in place


and this one!

stupid different screw head holding steering wheel shroud in place


I could not get these things out, well I got three of the six out but I was struggling with the rest and thought well it's not required to remove the shroud so I'll push on with it attached and the steering wheel in the lowest position... 

So following the guide I removed the ashtray, gearstick knob, the gearstick surround yada yada got the dash trim loose in my hands and then fought to remove the cable connectors from the blocks. Not having the strongest fingers in the land it was a bit of struggle but I managed it. Then the issue teasing the trim over the shroud which I'd been unable to remove at stage one. I did eventually manage to get the trim over the shroud but I knew that a problem needing resolved for putting it all back together otherwise the shroud would most likely be marked.

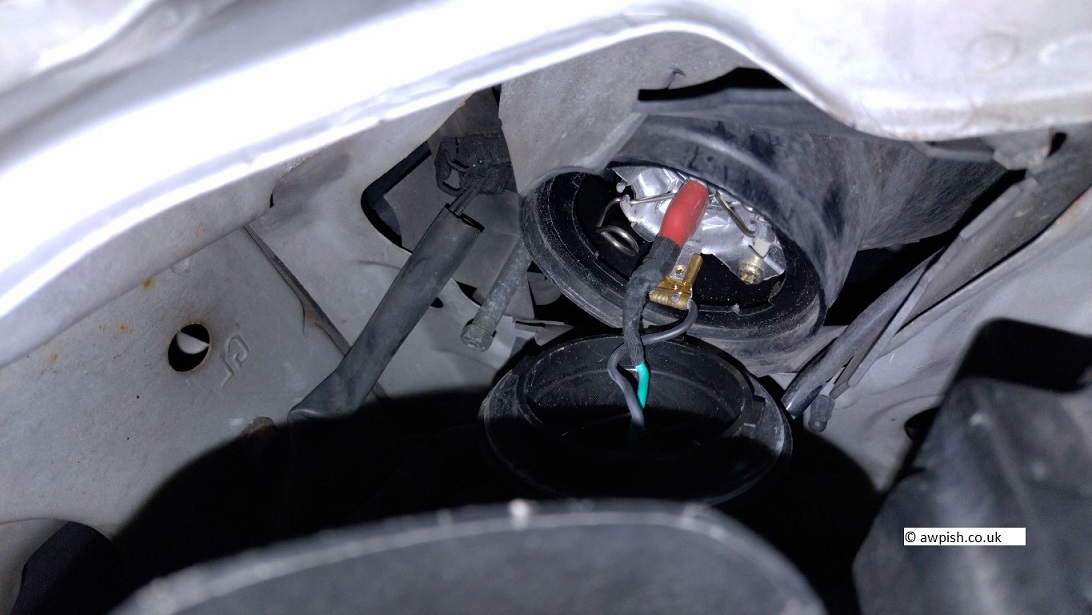
Then the dash display itself was unscrewed and as I'm going round the fixing points I am noticing quite a selection in the screw heads which made me wonder what was lurking in the shroud. Anyways, more fighting with cable connectors and booyah the display was out and then I saw it.

speed converter and speed delimiter found


A speed signal converter and de-limiter... mmmmm this was not entirely un-expected but also wasn't entirely expected either. I shall explain. On JDM cars they are fitted with KPH dials and odometers and also speed limited to 180kph and on import to the UK these things are a small issue. The problem with some cars occurs when the speed signal from the gearbox to the speedo head is altered which can in some cars then affect the speed sensitive steering and on HICAS equipped cars, the HICAS itself. You see on most cars the gearbox signal goes to the speedo head first, then a conditioned signal goes from the speedo head to the ECU which is then fed to other systems. Steering assist, speed limiters, rear wheel steering. On Nissan cars with HICAS feeding a signal to the ECU which is 5/8 of the actual speed of the car has caused issues with stability and a really really floaty feeling at speed. You have an indicated 50mph on your converted speedo which feeds 50(kph) to the other parts of the car and it follows the programme as per OEM design. Problem is, the car is actually doing 80kph not 50kph as the input signal suggest and the car might give more assistance than you'd expect and or want!

So, the fact my Nismo fitted 320kph dials and odometer read in mph yet I've never experience said floatiness while changing lanes / going round corners at 60/70mph indicated gave me the impression the car had no converter fitted but had been modified at the speedo itself using the ADJ solder pads on the PCB. Clearly not the case. Anyways, out with the display after more fighting with the connectors. 

Taa daa

dash trim and diaply out


So, in with the OEM dash and just leave it resting on the trim and se how it looks. Looks just right IMHO

OEM display in place and looking good


check the warning lights match the ones of the Nismo unit, they do bar the airbag light but I think that actually went out just after taking the photo. It certainly wasn't on when the engine was running

OEM display fitted and checked warning lights function as expected


Time to fire it up!


Ah crapo! The ole dancing rev counter. So short version of the events that unfolded after this.
I contacted the seller of the dials and he was super cool about me getting this investigated with a potential fix and I actually did have someone lined up to do it who would also set the odometer to match my current clocks. So i took the display out and waited for a an appointment. Then i decided to check the speedo worked cause that's a known issue as well and yep you guessed it, the speedo didn't work. It did read correctly at speed as verified by the GPS / HUD app I used on the phone but the needle was very slow to respond, nowhere near OEM response time and when sitting at a junction it was still showing 30mph. Fark.

So after speaking to the tech I was going to use he said meh send it back if you can and obtain a new speedo from Nissan (which you can actually do). In hindsight I could've sent the display away to a company down south who would have not only fixed all the solder / resistors / capacitors but also put the odometer to match my current one however i did not find this company on the web until after I had already started the returns process. In the meantime I'd already plugged in my Nismo display just to make sure it still worked and read same as before - thankfully it did. Phew!

Next problem, that damned shroud above the steering wheel. I bought some new longer reach Phillips screwdriver bits and finally got the damned screws out. WTF - no wonder some wouldn't come out cause they were cutting a grove into the damned channel. What's that, three different screw types where there should only be one? Grrrr. I bought some Cap head screws and put three in to hold the shroud and then i actually bought some problem Phillips head screws for the job. Toying with replacing all screws / bolts I take out with Torx head units.

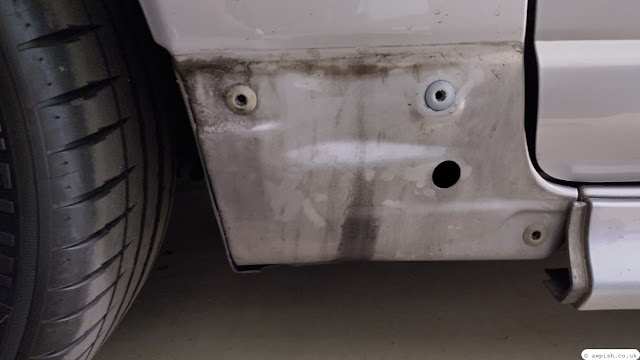
So while i had the dash out i figured might as well try and move the alarm LED to somewhere more obvious and er well lets say it wasn't the best job done but it works. Might as well use the previously butchered GTR coin slot cover for something.

GTR coin slot holder moved to dash blank and alarm LED fitted


I'm still not convinced I was right to return that display unit but car is back to where it was and more musing since. 


Sunday, October 19, 2025

GTR boot lid struts replacement

 so yeah the boot struts in the GTR were long past their best and quite frankly damned dangerous! The trip to Applecross confirmed i really needed to do something about it cause the lid one again tried to de-capitate me haha. So, the struts (all 30yrs of existence of them) had long cried enough and because the boot latch sticks proud of the bottom edge of the boot, when that lid comes down it's really gonna hurt if your head is still in the boot, getting the sleeping bag as it was in the this case.

Now Nissan in their infinite wisdom chose to fit closed socket joints on one end of the socket with a welded bracket at the other end to secure them to the lid. Why oh why they did this is likely another reason why as a company they are struggling to keep going. Anyhow, to replace these struts involved 2 options

  • remove the two entire strut and boot lid attachments and send off to get new struts attached
  • buy replacement struts and then cut off the old ones with a Dremel and hope the bracket supplied actually works
However a problem with many replacement units in that they are a touch shorter than OEM fitment with the result the boot lid doesn't open as far as OEM. Might not be a problem in real world but doesn't seem like a good starting point to limit how far the lid opens and risk smacking ones head into said boot lock latch. So after much searching and procrastination I found Up Garage USA and their full height strut replacements. They also had a handy video for getting the bottom socket off the car without resorting to a cutting disc. Far safer for sure, just use plenty of lube and take your time.... A lesson for life maybe heh heh?

Anyhow, I actually did this mid May just didn't post it. 


I also replaced the petrol flap spring as i was having to open the flap using the end of a credit card, again didn't post it at the time


Haven't done much else, I did try replacement clocks for the dash but they didn't work so back to the current ones. 


Monday, May 26, 2025

Passenger side front moulding fix

when i bought the GTR it was in pretty good nick but there were a few things needing done to make it functional. Fuel cap didn't release properly, boot lid struts were definitely dead and the front passenger side mudguard moulding was hanging off the wing. Not a huge deal as you can see below but annoying enough. 

front moulding sitting out from wing


As part of the slowly slowly building up the car to be 'fixed' but standard I had bought some body clips to get the issue fixed but on checking the car the mechanic found that although I needed the body clips I also needed the moulding clips as well to allow the two wing and moulding to fit into each other. This was put on the back burner for a while as basically I was lazy. Fast forward a year or so and I started looking for the clips for the mouldings. I couldn't find them anywhere as a stand alone part though i could buy a complete set of clips for all the body mouldings but it was kerching.... Anyhow, I did a bit of asking around on the forums and somehow managed to find a part number which then lead to another of those GTR ownership moments. Yep you can get the part brand new in the UK / EU but kerching! So i searched the Japanese market and lo there were at a more sensible price and with postage to the UK I could get few clips for less than the price of one sourced locally. As it turns out, handy I did buy a few...

So with the clips in hand and about 5 months after I had actually received them today i tackled the problem. Moulding clips below and a spare body mount as well.

moulding clips


Since I do not have access to ramps at home a supplemental tool was required to locate the screws holding the bottom of the moulding to the car.

moulding underbody mounting points


Doesn't have to be fancy it just needs to work :)  So underbody fasteners removed (two of) and the two wing mounted fasteners removed


Pull the moulding off and tada there you have it. What this first picture doesn't show you is there are three body clips required

body moulding removed from car


and it was only when I looked at the car itself that I noticed the three body clips looking all lonely for a moulding clip to fit

body showing mounting clips for moulding 3 clips


Another quick look at the moulding and yes there is the third clip position to match the body. Luckily i had bought more than the one clip I thought I needed. Zero clips in place originally (well from previous owner), no wonder it hung a bit out in the breeze eh ? So, three brand new clips in place and now to squeeze it back onto the car.

moulding showing the three required clip mounting holes


All back together again and matching the drivers side. Job done and knuckles and tools intact.

moulding reattached and everything looking good


Wednesday, May 07, 2025

Spring Break run to Applecross

 so the weather was forecast to be dry and sunny daytime but cold cold at night. At first I'd booked a wee camping spot but then quickly realised that was a stupid idea and upgraded myself to one of the cabins in the Applecross Campsite. Brilliant wee things, the one i booked was for two folks but they all have big thick foam mattresses either 2 or 4 depending on cabin size, a light inside, light outside and a heater! The also have at least one power point in them for charging phones etc. Cracking deal, highly recommend it. 

So I'm not one for taking tonnes of pictures but I took a few.

Run down the north side of the Pass of the Cattle, purpose built layby with viewpoint and good photo op


Got to the Applecross campsite and unpacked the sleeping bag(s) and sorted out the mattress. What that lurking in the background there?


After getting everything sorted in the cabin, time for some beers in the sun while drinking in the view. Then I walked to the Inn for some more beers, bit of chat and some dinner. Right outside the campsite I met these two just happily grazing on the local grass


This is the view from the seats outside the Applecross Inn and is mighty fine to sit outside when the weather is warm however don't be fooled by the sunny view here, it wasn't exactly warm by this time of the evening as the chill in  the May weather was beginning to bite. Still, it is warm and dry and cosy in the Inn


After a fine fish and chips, time for the walk home and what a view at night


Next morning set off early after a shower and headed for breakfast at the Waterside Cafe in Loch Carron. A mighty fine warm sunny morning it was so breakfast outside it was. Views and a fry up with the Bru, perfect.


After that mighty feed it was back into the car and heading for home. I will have to change my route to get home and potentially the route up there as the traffic was pretty bad and almost no opportunities to overtake safely. Far too many cars / vans on the road and it was a long trip sitting behind folks. I did however manage and avg of 25mpg which for the GTR is a poor reflection or my driving haha. Should be into the low 10s' :) 


Saturday, April 26, 2025

Mustang no more

 Indeed the time came to move on from the Mustang and into the so far unforaged field of the 4 or 5 door vehicle. Sigh. So anyways, couldn't decide what i wanted and short version, i got a Kia Stinger. 20plate with low miles on it so here we are. Got a decent trade in for the steed so can't complain.

Friday, April 18, 2025

MOT passed, yippeee

 indeed the GTR has passed its MOT, couple weeks ago actually but hey ho all done. Summer oil and filter change completed also, car given the once over and now just for decent weather....

Wednesday, March 26, 2025

Wheel Alignment and first run of spring hopefully not the last

 indeed yes it was a bit busy a week or so ago. So got the GTR alignment all done, I thought it would be easy enough to do as it was done last year so everything should have been moveable but cars being cars there was always going to be one eh ? Anyhow, everything that could be adjusted from factory was indeed adjusted and then it was just down to testing it. 

Quick recap. Sometimes the car had a tendency to crab left under braking and while it wasn't causing big issues it certainly wasn't by design. So, new tyres fitted, alignment (re)done just testing required. 

As luck would have it a beautiful sunny day came along and like a child at the beach I just dove (drove??) straight in. Fabulous day, air con on, sunnies on RB26 singing away and on first drive everything was working just nicely. Bearing in mind this is the cars first proper run since being laid up for Winter, tyre fitting and alignment aside. Brakes seemed fine, engine seemed fine, TEINs rock solid but not clanking so I guess working ok. Anyhows, plooting along a favourite road of mine, going a lot further down the road than I thought I would be going I discovered they had over the winter re-laid a rather large section of road and now instead of resembling the moons surface the road is billiard table smooth. Ya dancer!

While driving south I passed an old style iron bridge and I've always thought that pictures with bridges and cars in them are just amazing. So on the homeward journey back I managed to grab a couple of snaps though obviously I still cannot take good pictures so here they are.


and from the other side


Saturday, March 01, 2025

New tyres fitted - GTR

 so the march towards getting the GTR ready for spring / summer progresses, not at the quickest pace but better than last year that's for sure. As it still has the stock 9x17inch wheels i plumbed for 255x40 same as fitted by previous owner but Michelin PS4 tyres and all four corners replaced. I would have gone 245x45 as per spec to get a slightly higher rolling radius to help the front splitter but remembering the MR2 and it's 245x45 on a 9inch width, it just looked a bit stretched and with our potholed roads we need all the rim protection going. 255x40 just looks nice on the rim so there it is. Next stop, alignment then see it if still tracks a bit under braking.

Saturday, February 15, 2025

Approaching spring time - list of things to do

 so yes spring is around the corner and we must prepare for this time of year. Normally that'd mean gardening stuff but in fact I am talking about car stuff. Specifically the GTR as its MOT is due mid April... Squeaky bottom time.

So to prepare for this event I decided to awaken it from its winter slumber and do some really basic checks like

  • does the car actually fire up - it did and sounded fab
  • does anything leak out of the bottom of it - nothing did
  • is there a burning smell  - no there is not
So once the above was done I figured while I'm here I'll check the lights work and boom it happened. Passenger side low beam comes on and then fades away... GTR headlight bulb change is a bumper off shot in most cases. Sigh. 

Anyhow I check the fuses (in the rear boot shelf in case anyone wonders) and fuses are fine so we're looking at the bulb. So after much swearing I remove the airbox snorkel and have a squint at the bulb and I reckon I can get my small hands in there and get the case off and the bulb out. This is what it looks like


Not the biggest amount of space to work in but I managed to twist the plastic bulb cover off, release the spring holding the bulb in, thankfully the light unit does retain the spring and then get the bulb out. Quick test on the multimeter and yep bulb is toast. Luckily when I bought the car they had left a headlight bulb in the car and luckily i knew where said bulb was stored. Tested the new bulb (H1 55W in case anyone wonders ) with the multimeter and it seemed ok so plugged it into the wiring, shoved it back into the light unit and pushed the spring clip back over the bulb end. Moment of truth and both headlights now working fine, even the same shade of light on the garage door. Hoo raa. I wont bore with the details of trying to get the damned plastic screw on cap back on the headlight anything like that other than it really was a pain in the fingers and arms. 

The list of jobs to do before spring driving season include but not limited to

  • new tyres to get fitted - ordered some Michelin PS4 which should be plenty grippy for me
  • get tyre alignment done - tba
  • get the floor inspected and any underseal top up done - tba but process started
  • oil and filter change 
  • MOT booked and er deal with any issues..
think that's it really.